
Con lo fácil que es, y teniendo tiempo puedes crearlo, te presento el paso a paso, así como lo dice su autora, aquí lo tienes...
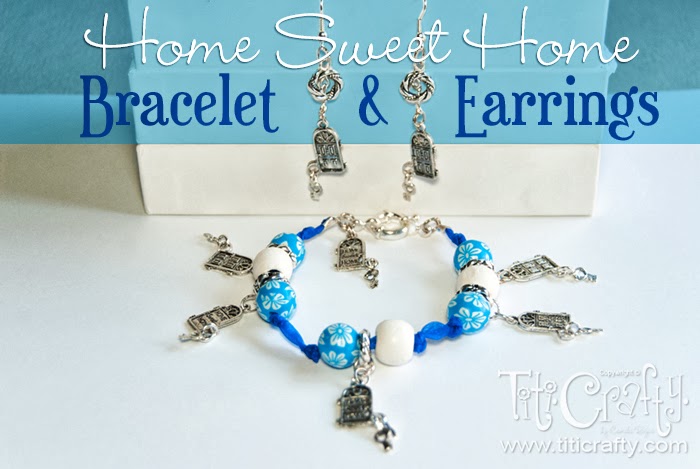
DIY Home Sweet Home Brazalete y Zarcillos
I?m becoming a fan of crafty jewelry lol, now every time I see pendants, tools, or any supply for it I really feel the eager to buy and create something LOL. I need to control myself because if I buy too much I end up not doing anything, so I?m trying to make one thing at a time?. Well ok maybe 2 or 3 LOL, but that?s it hahahaha!
Me estoy convirtiendo en fan de la bisutería artesanal Ja!, ahora cada vez que veo dijes, herramientas o cualquier material de joyería siento la necesidad de comprarrrr y crear algo jajaja. Necesito controlarme porque si compro mucho termino no haciendo nada, así que trato de hacer una cosa a la vez? bueno, ok tal vez 2 o 3 jajaja pero hasta ahí JA!

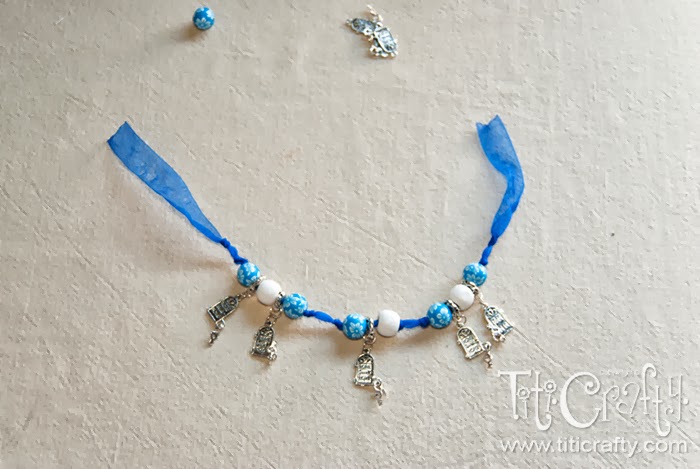
Here I have a lovely bracelet I made using beads, some cute little Door with a key pendants and organza ribbon. I really loved how they turned out and super easy to make, so, I?m sharing then with you =D
Aquí tengo un lindo brazalete y sus zarcillos que hice usando cuentas, unos lindos dijes de puertica con llave y cinta de organza. La verdad es que me encantó como quedaron y son súper fáciles de hacer, así que lo comparto con ustedes =D
What you need:
Lo que necesitas:
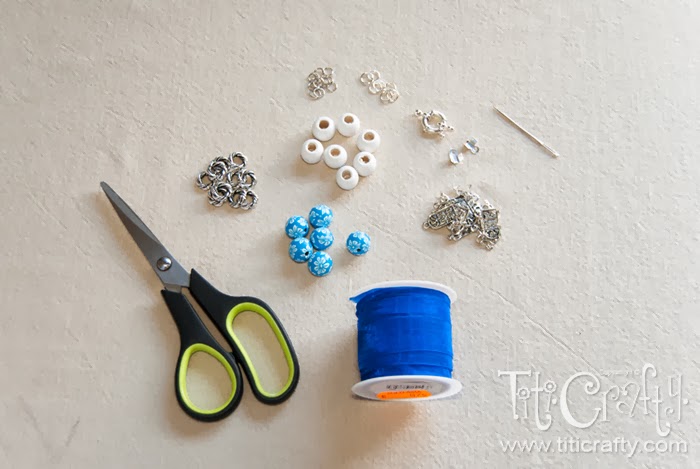
Also for the Earrings You would need some Jewelry needles and Earrings rings.
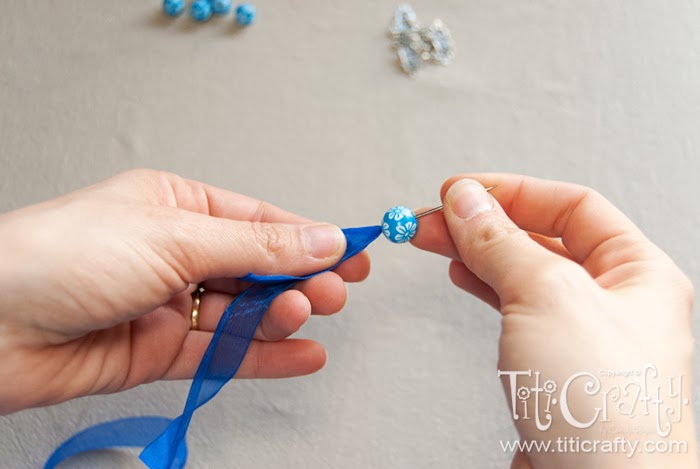
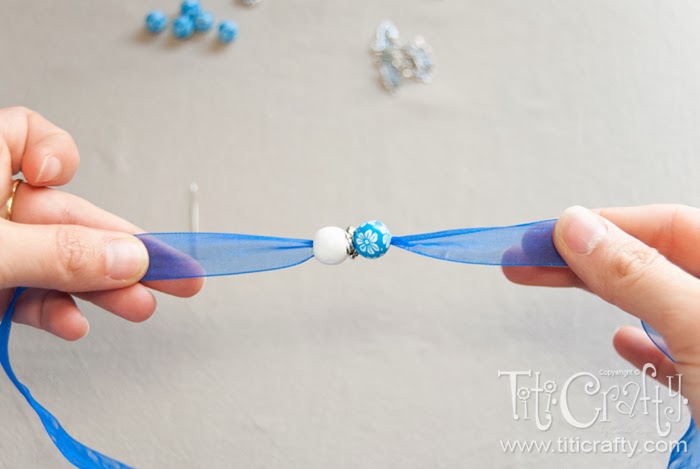
1
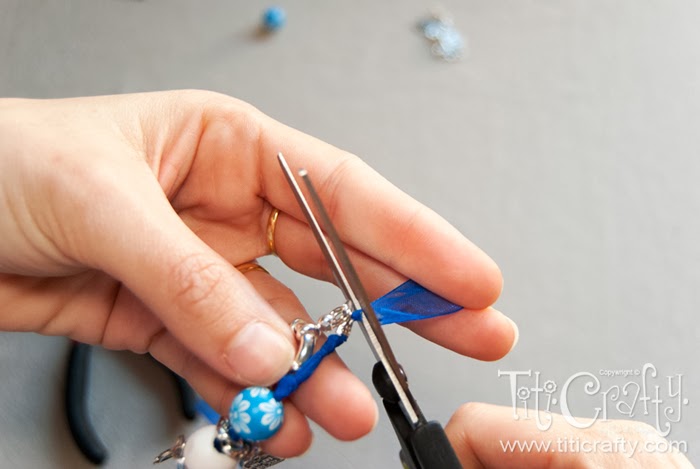
First thing cut a strip of ribbon doubling the size you want the bracelet (even a bit more)
Lo primero es cortar un trozo de cinta al menos del doble del tamaño que deseas el brazalete (un poco más es mejor)
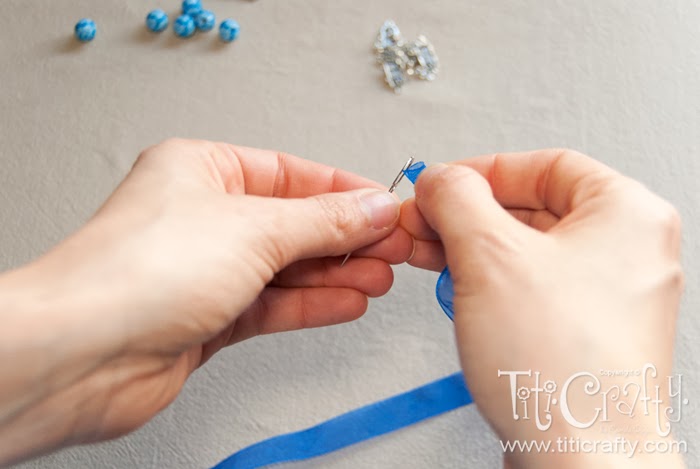
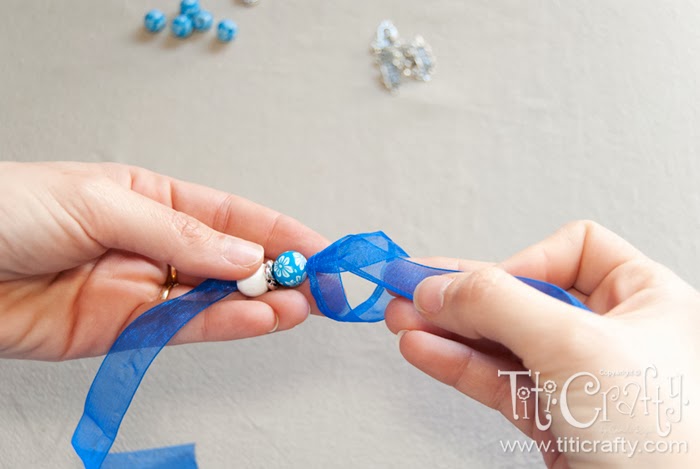
2
Insert the ribbon in the needle
Inserta la cinta en la aguja
3
4
5

6
7

8

9
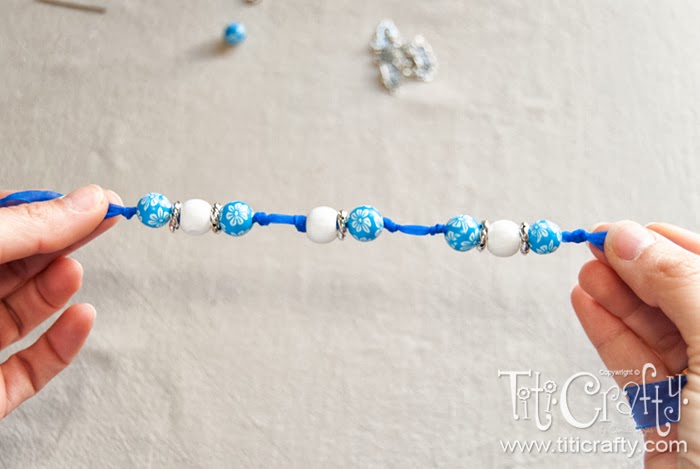
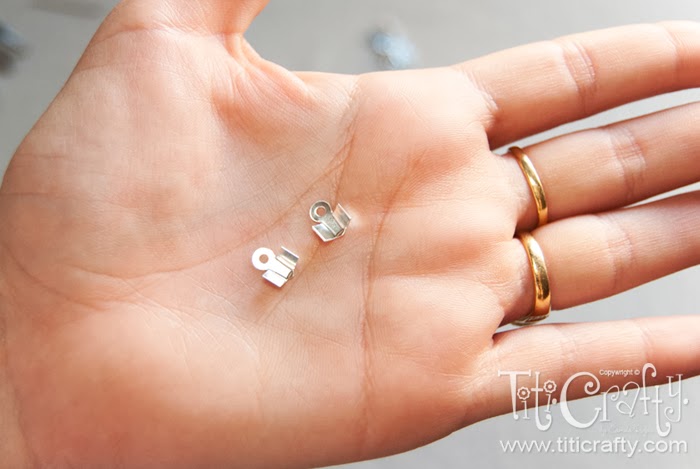
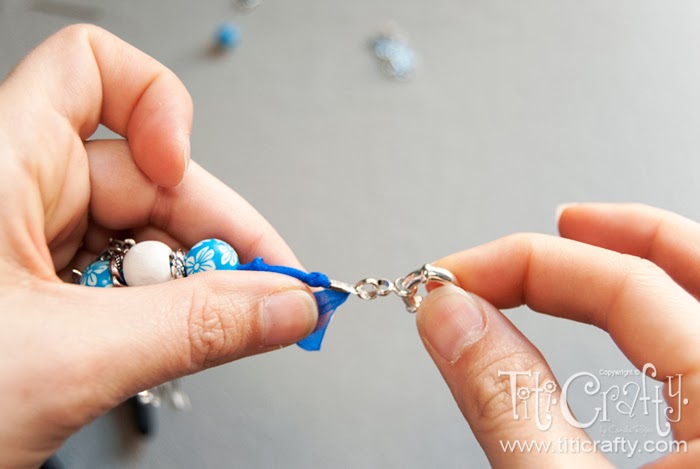
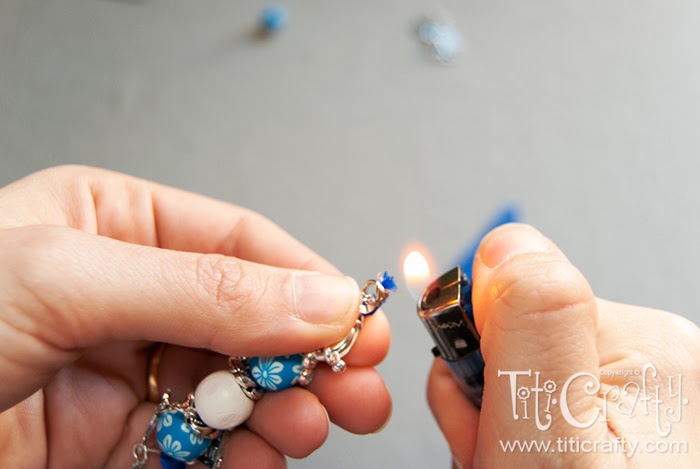
Place the cord ends right before where you want the bracelet to be closing (remember that the clasps make it a bit longer). For more details on this step you can go HERE
Coloca el conector justo detrás del lugar donde quieres que cierre el brazalete (recuerda que el cierre lo alarga un poco). Para más detalles en etse paso puede ir AQUÍ
10
11
12
DONE!!!! Woot woot
LISTO!!! Yupiiiiiiii

Ahora los zarcillos
1
2
3
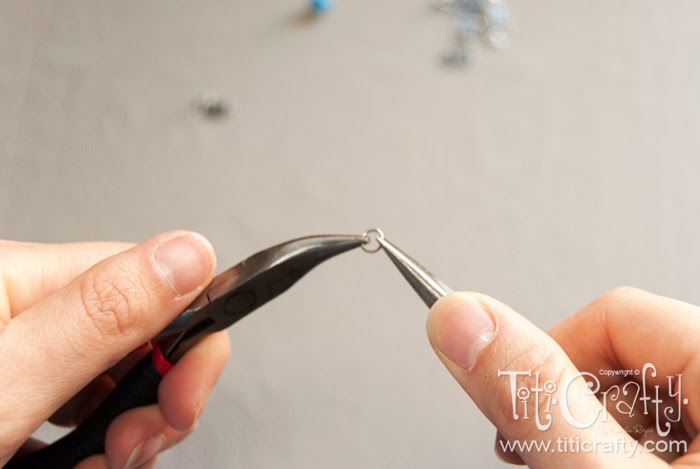
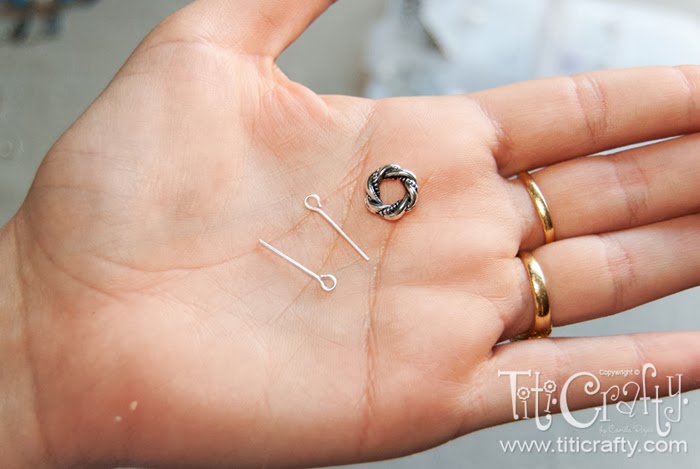
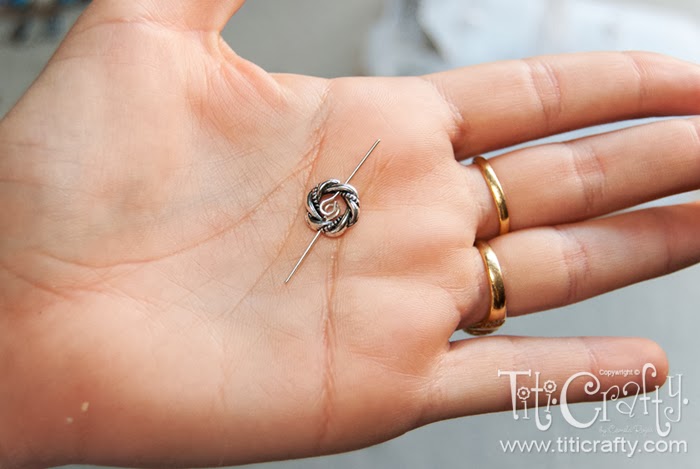
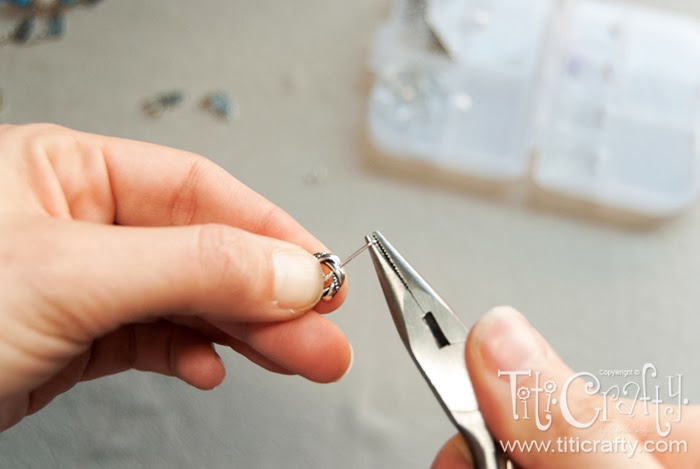
With a needle nosed pliers (is what I?ve got lol) make a swirl with the wire left on both ends.
With a needle nosed pliers (is what I?ve got lol) make a swirl with the wire left on both ends.
Con una pinza o alicate (es lo que tenía jajaja) has un aro con el alambre sobrante en ambos extremos.
4
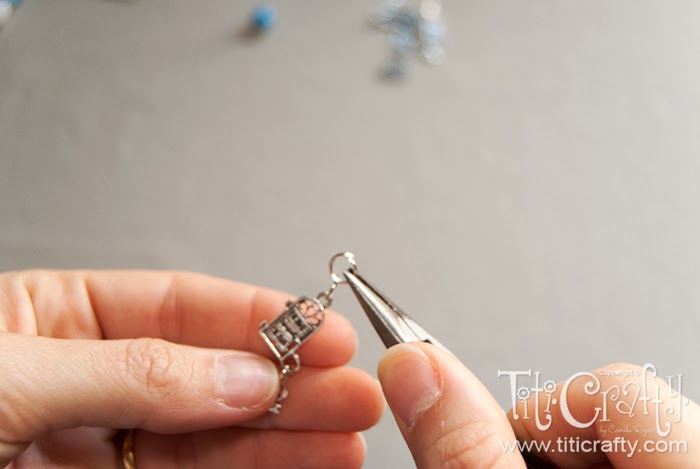
Using jump rings connect the earrings rings and the pendants to the previews piece.
Usando aros conectores conecta los aros de zarcillos y los pendientes a la pieza anterior,
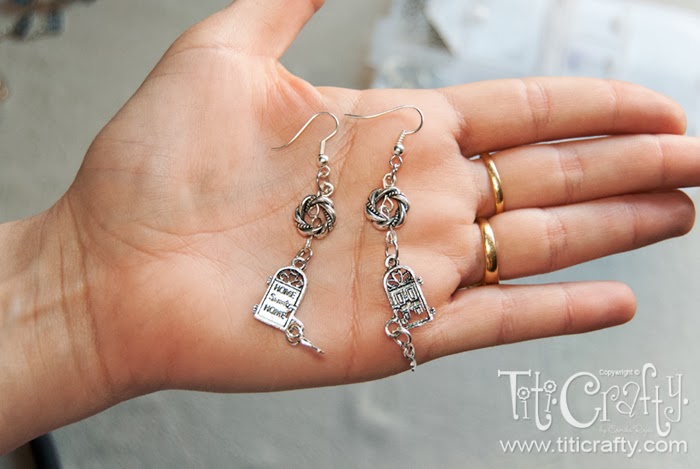
DONE!!! Super easy, right?
LISTO!!! Súper fácil, ¿verdad?
NOTA: DEL BLOG TITICRAFLY
Hola Irene, que belleza las pulseras, un tutorial fácil de entender y como todas tus apuestas que son una maravilla, que reconforta a muchas manos creadoras de tan bello arte como la biyuterie.
ResponderEliminarDesde SALTA, ARGENTINA UN ABRAZO y hasta prontito GRACIELA
Hola Graciela, muchas gracias por tu visita, dime como está tu bello país?, tengo una vecina que los está visitando, se fue alegre, diciéndome que Argentina es la europa, de América Latina, y yo aquí me quedé con las ganas de irme también,jajaja.
ResponderEliminarSaludos y Dios permita que estés bien, y los de tu casa , abrazos.